Today we took a walk in the woods and picked the last few elderflowers. Most had already turned to berries, earlier than usual, probably because of the warm weather.
I used these to have my first go at making elderflower cordial. There are plenty of recipes around; this is the one my mother-in-law uses.
Ingredients:
15 large elderflower heads
1kg sugar
900ml boiling water
2 sliced lemons
40g citric acid
First, checking each elderflower head is free of insects, snip off the flowers, trying to leave out as much of the stalk as possible. (This was the timeconsuming part for me, particualrly as I made triple quantities! The rest took no time at all.)
Then dissolve the sugar into the boiling water in a 2 litre bowl. Once the sugar has dissolved, add in the citric acid. Finally, add the sliced lemons and elderflowers and stir. Cover and put aside, stirring once a day for a week.
After a week , strain through some muslin and pour into some sterilised bottles. It will keep in the fridge for up to 1 year. Alternatively, put in plastic bottles in the freezer, leaving some room for expansion. I'll update next week, once I know what quantity this makes.
Update: The quantity given in the recipe makes around 1.5 litres. As I was making triple quantities, we now have 4.5 litres of cordial at cost of around £6 . At Glastonbury last week, there was a homemade elderflower coridal stand selling it at £2 / glass. At that price, I didn't taste theirs, but I can tell you that ours tastes great!
The Big Mango - a blog about big things, mangos, big mangos and completely unrelated stuff
11 Jun 2011
8 Jun 2011
Breadmaking of a different kind
Well, it’s been quite a few weeks since my last post. Since then, we’ve redecorated our dining room, had visitors, both been ill and I’ve been to Chicago for a conference. I have managed to get myself organised again using GTD and have progressed with my grand plan to sort out my digital photos. Maybe I’ll do some posts on these later.
In this post, I wanted to show you last weekend’s project – making bread.
I love making bread and specifically I love my breadmaker. I could bore you for hours about my breadmaker love. But this time I didn’t use the breadmaker, I used the sewing machine - I made felt bread. In fact, a felt sandwich!

It’s my niece's 3rd birthday this week and her parents have bought her a play kitchen so I’ve made her a felt sandwich as something for her to prepare in her kitchen.
I was originally inspired by this felt food on Craftster and found these patterns and instructions.
Bread
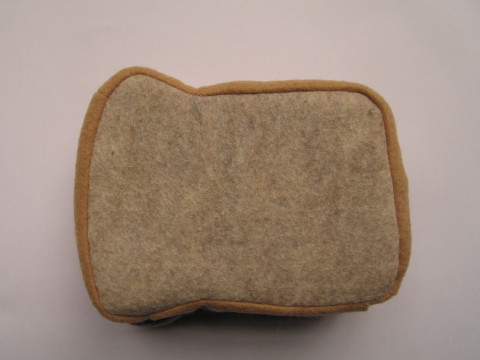
Now, I’m too lazy for the hand sewing all these patterns suggested and decided to machine stitch the bread instead. Big mistake!

I added seam allowances to the bread pieces but had terrible difficulty sewing an even width crust. I ended up unpicking the stitching twice until I gave up and hand sewed the rest. For the second slice, I pinned the crust round the corners for all I was worth and machine stitched one side and hand stitched the other. The result ws a lot better but I would still like to be able to machine stitch both sides nice and evenly. It took me over four hours just to make the two slices of bread.
Swiss cheese
Last year I read Margaret Beal’s fantastic book, Fusing Fabric. So for the Swiss cheese, I used her method of fusing the two layers of felt and cutting shapes with a soldering iron. Although I am an electronic engineer, I haven’t done any soldering in years and managed to get a bit tangled and melted the cable protection a bit! Fortunately, it is still intact and safe to use.
The cheese slice took me all of 10 mins to make and it was great to try a new technique.

Tomato slices
I then tried to use the soldering iron to cut out the fiddly tomato slices but found the edges where I’d melted the felt were too burnt and the end result didn’t look good. So, back to stitching…
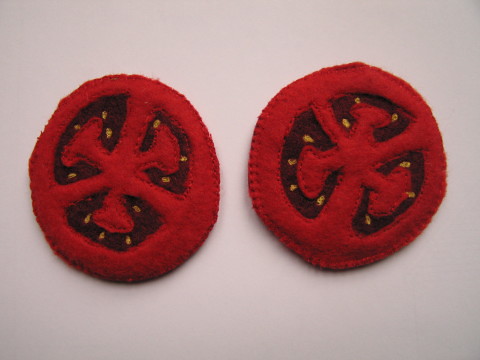
I used oneinchworld’s method but stitched the two sides together as I don’t have the needle felting kit. Also, I free machined the seeds. I’m very happy with the results but it was rather time consuming.
Lettuce
Finally, the last piece was the lettuce which was very straightforward.

So, here is the result:

We certainly had fun playing with it and despite the 10+ hours it took to make, I am now thinking of making a set for us to keep!
In this post, I wanted to show you last weekend’s project – making bread.
I love making bread and specifically I love my breadmaker. I could bore you for hours about my breadmaker love. But this time I didn’t use the breadmaker, I used the sewing machine - I made felt bread. In fact, a felt sandwich!

It’s my niece's 3rd birthday this week and her parents have bought her a play kitchen so I’ve made her a felt sandwich as something for her to prepare in her kitchen.
I was originally inspired by this felt food on Craftster and found these patterns and instructions.
Bread
Now, I’m too lazy for the hand sewing all these patterns suggested and decided to machine stitch the bread instead. Big mistake!

I added seam allowances to the bread pieces but had terrible difficulty sewing an even width crust. I ended up unpicking the stitching twice until I gave up and hand sewed the rest. For the second slice, I pinned the crust round the corners for all I was worth and machine stitched one side and hand stitched the other. The result ws a lot better but I would still like to be able to machine stitch both sides nice and evenly. It took me over four hours just to make the two slices of bread.

Swiss cheese
Last year I read Margaret Beal’s fantastic book, Fusing Fabric. So for the Swiss cheese, I used her method of fusing the two layers of felt and cutting shapes with a soldering iron. Although I am an electronic engineer, I haven’t done any soldering in years and managed to get a bit tangled and melted the cable protection a bit! Fortunately, it is still intact and safe to use.
The cheese slice took me all of 10 mins to make and it was great to try a new technique.

Tomato slices
I then tried to use the soldering iron to cut out the fiddly tomato slices but found the edges where I’d melted the felt were too burnt and the end result didn’t look good. So, back to stitching…
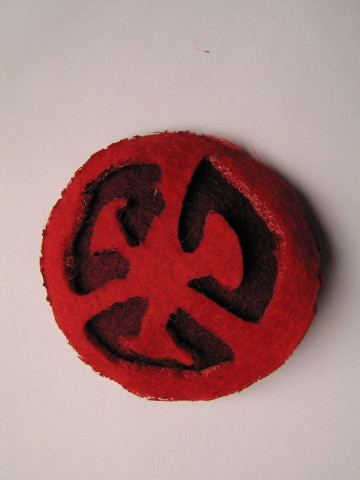 |
| Prototype soldered tomato slice |
I used oneinchworld’s method but stitched the two sides together as I don’t have the needle felting kit. Also, I free machined the seeds. I’m very happy with the results but it was rather time consuming.

Lettuce
Finally, the last piece was the lettuce which was very straightforward.

So, here is the result:

We certainly had fun playing with it and despite the 10+ hours it took to make, I am now thinking of making a set for us to keep!
 |
| Bob likes messy food which I don't let him have. A felt sandwich satisfies both our requirements. |
 |
| The bear tries on the sandwich for size before clambering around wearing a 'sandwich board', shouting "Golf Sale"! |
17 Apr 2011
Gardening in the sunshine
Last year was my first year owning a garden. Last summer we grew tomatoes, courgettes, peas, sweetcorn, lettuce, peppers, chillies, runner beans, strawberries and raspberries.
The tomatoes suffered from tomato blight and blossom end rot; the courgette plant had powdery mildew; the sweetcorn was eaten by birds as were half the lettuce plants; and the runner beans were infested by aphids! Despite all that, it was fun, I learned lots and we did get a reasonable amount to eat.
This weekend we've had lovely weather and so yesterday I mowed the lawn. I'm really enjoying the way the garden looks at the moment. The apple trees are in blossom and the ground is covered in forget-me-nots.
I started sowing some seeds today. I've planted garlic chives, marjoram, rocket and lambs lettuce so far. I also harvested my first salad leaves for the year - they grew in a pot I used to grow salad in last year and then left outside over the winter. I guess that the warmer weather meant that some leftover seeds germinated which meant some bonus no-effort salad for me.
Afterwards, I used the instructions from house on the hill road to make some gardeners' hand scrub. It simply involved mixing together some sugar and liquid soap. I used some moisturising soap so it left my hands clean and soft.
10 Apr 2011
Postcard swap part 3
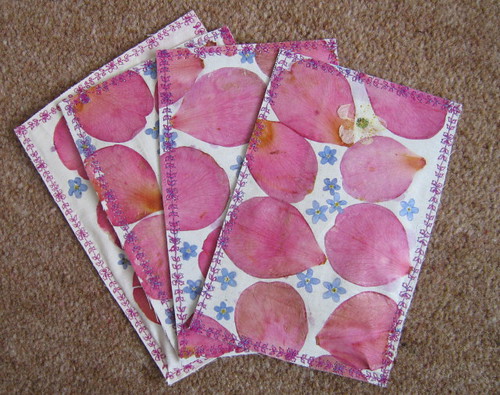
Here are all the flower postcards that I made for the postcard swap:
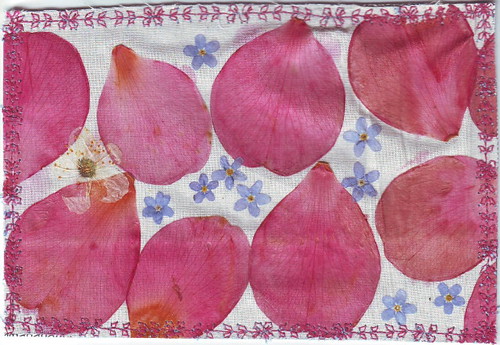

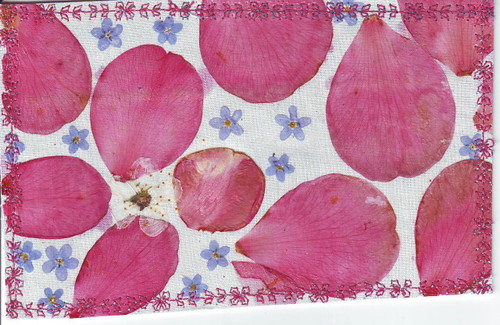
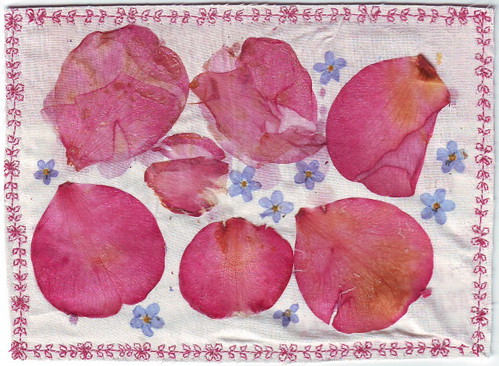
As this last one was going within the UK, I sent it naked - no envelope. I hope Royal Mail treat it well.
I used camellia petals, forget-me-nots and cherry blossoms from my garden. The results were very variable - some of the petals turned brownish, some bits didn't stick properly and the cherry blossom went very transparent. Despite their imperfections and the wonkiness of the stitched lines, I think the postcards have an antique looking charm about them. Flowers are in bloom for such a short time that it's nice to capture them in postcards.
Postcard Swap part 2
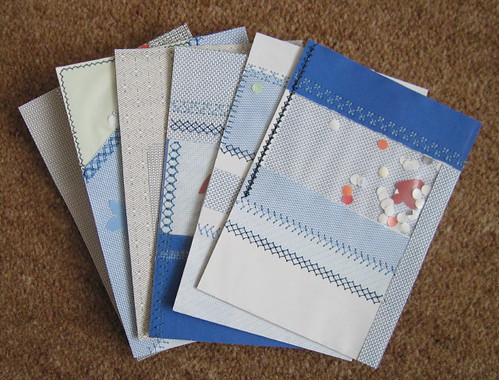
Here are all the collaged envelope postcards that I made for the postcard swap:
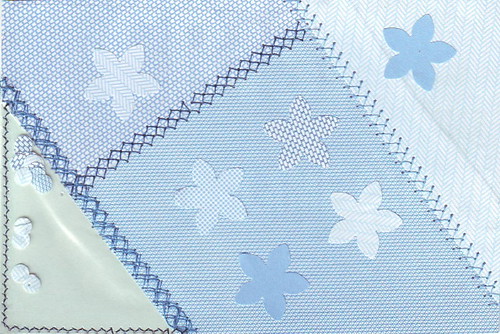
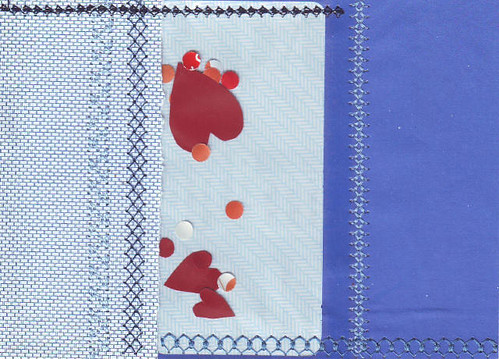
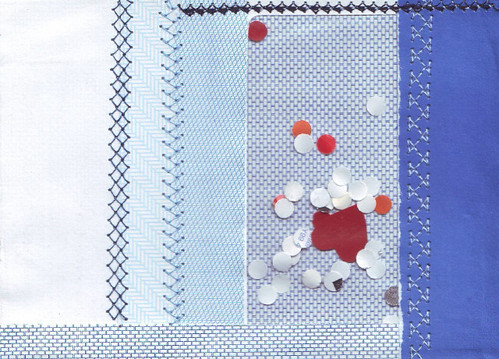
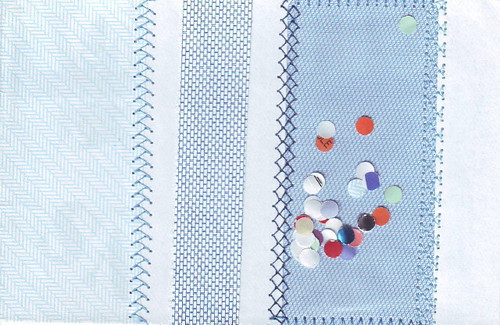
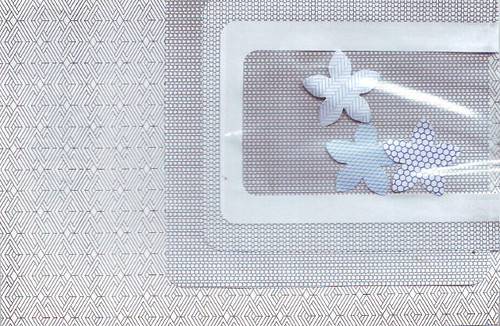
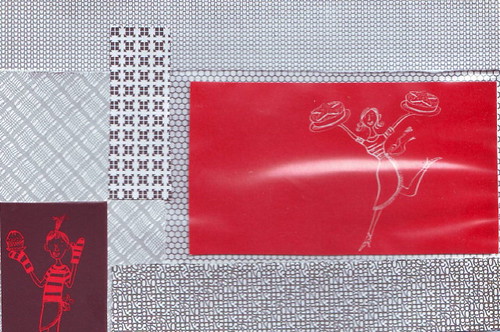
I wanted to experiment with shake-able pockets and was wondering what to use when it suddenly struck me that I could use the windows from the envelopes. Pretty obvious really! In the end, these didn't shake quite as freely as I hoped. I suspect that the paper shapes are not heavy enough.
I tried out different designs but I think favourite is the simplest one - just stripes (the fourth one down).
Postcard Swap part 1
I used to collect postcards and have recently rediscovered them as something to make. They're great as they are quite small and so not too large a project, yet big enough to really fully try out new ideas and techniques.
For iHanna's DIY postcard swap, I made 10 postcards and tried out two new techniques. The first was collage using envelopes. I experimented with the idea of windows, some of which are shake-able.(Here they are in full)
For the other set, I used real flowers. ( Here you can see them all.)
I used the rainbow embridery sampler postcards I made to choose the stitch patterns for the embroidery. For the envelope postcards, I chose graphic designs to match the patterns on the envelopes. Of course, for the flower postcards, I chose a flowery stitch.
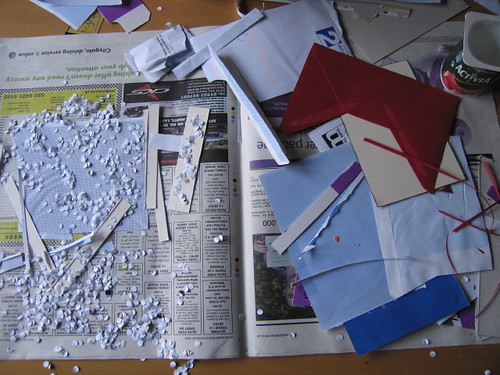
I'm really pleased with how they all turned out. It was fun making them. Don't tell MrMango but I did make qute a mess!
For iHanna's DIY postcard swap, I made 10 postcards and tried out two new techniques. The first was collage using envelopes. I experimented with the idea of windows, some of which are shake-able.(Here they are in full)

For the other set, I used real flowers. ( Here you can see them all.)

I used the rainbow embridery sampler postcards I made to choose the stitch patterns for the embroidery. For the envelope postcards, I chose graphic designs to match the patterns on the envelopes. Of course, for the flower postcards, I chose a flowery stitch.
I'm really pleased with how they all turned out. It was fun making them. Don't tell MrMango but I did make qute a mess!

21 Mar 2011
Pre-loved
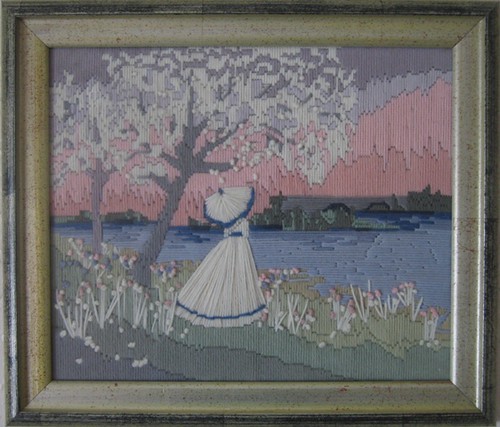
I popped into the local charity shop at the weekend and came back with this embroidery. I have quite backlog of things that need framing and displaying and this doesn't really go with anything else we have, but I couldn't resist.
It's a wool embroidery on some kind of canvas. Does this type of work have a name?
There was also a companion piece which I didn't like as much, but I hope someone does and gives it a good home.
I love the colours and the stitching - very long straight stitches. I've realised that, like many pictures that appeal to me, it is made of of several coloured bands - the grass, the water and the sky. The only part I don't like is the colour of the frame.
It's clear that someone put a lot of time and effort making this and I'd love to know it's history. Who made it, when and for whom? Is it from a pattern or did they design it themself? How did it end up at a charity shop? I have a feeling that the answer to that last question is going to be a sad story.
***
Someone has been having a clearout as there were five books on embroidery for sale that I'd not seen there before. I bought three and am tempted to go back and buy the others.
19 Mar 2011
Matchbox Swap part 3
Well, the Craftster matchbox Swap Round 4 is over so I thought I'd post some of my favourites. I'm amazed at how people took such a simple theme and came up with such imaginative creations.
jennieingram created this fabulous Tardis matchbox for spidermom:

I loved this sewing themed one for jennieingram by spidermom ( the swap co-organiser). I particularly like the charms and the postage stamp.

fibreartist4life's one for Sonjaboo (who was also my partner) is so creative. The matchbox is the basement of the house.

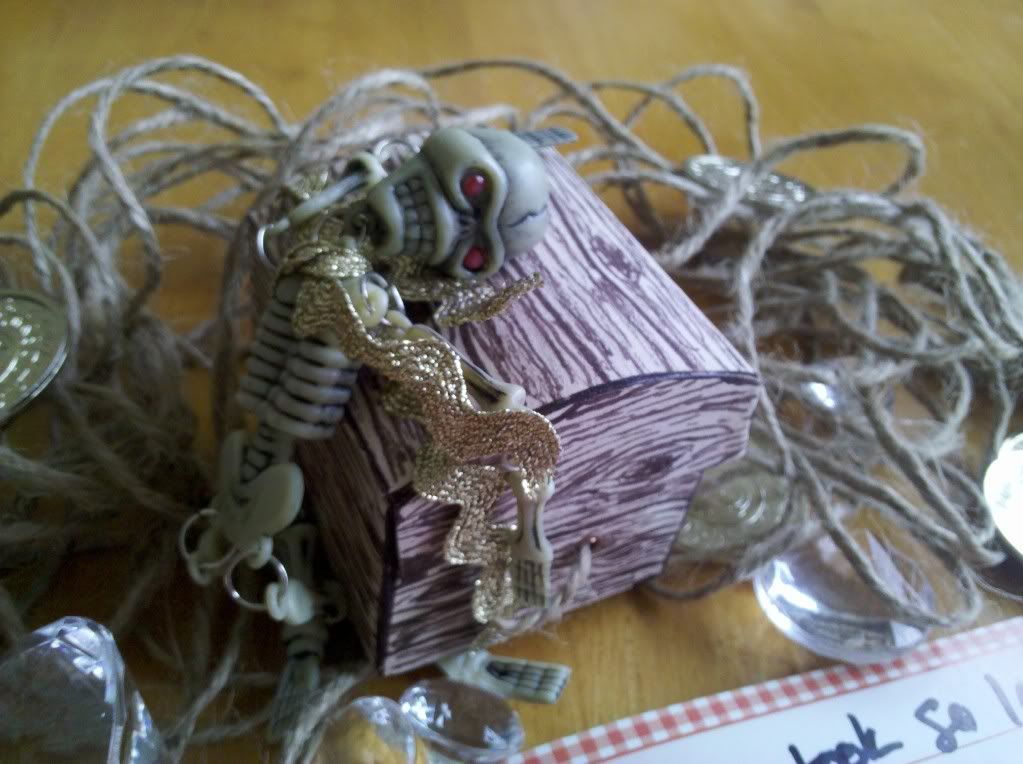
This treasure chest for loves2experiment by BennuBird is totally brilliant and cleverly constructed with a false bottom.
avocadoeldorado's monster matchbox for Fosca is so much fun:


and this toaster by SaraD for camelama made me laugh a lot.

Check our the entire gallery here. Round 5 is open already.
(All images are by the recipient or artist. Click on the image to see the original thread)
jennieingram created this fabulous Tardis matchbox for spidermom:

I loved this sewing themed one for jennieingram by spidermom ( the swap co-organiser). I particularly like the charms and the postage stamp.

fibreartist4life's one for Sonjaboo (who was also my partner) is so creative. The matchbox is the basement of the house.

This treasure chest for loves2experiment by BennuBird is totally brilliant and cleverly constructed with a false bottom.

avocadoeldorado's monster matchbox for Fosca is so much fun:
and this toaster by SaraD for camelama made me laugh a lot.

Check our the entire gallery here. Round 5 is open already.
(All images are by the recipient or artist. Click on the image to see the original thread)
The Rain in Spain...
...occurs mainly when I visit. We're back from a few days in Barcelona which consisted of visiting great art and architecture, eating well and getting rather wet!

We visited several Gaudi sights and found that they've finished the interior of La Sagrada Familia since I last visited. I loved the stained glass.

My favourite part was wandering the streets of the Barri Gotic which are a pedestrianised labyrinth of lanes and squares . You can't go more than a few shops before coming across another colourful branch of Desigual or Custo Barcelona.
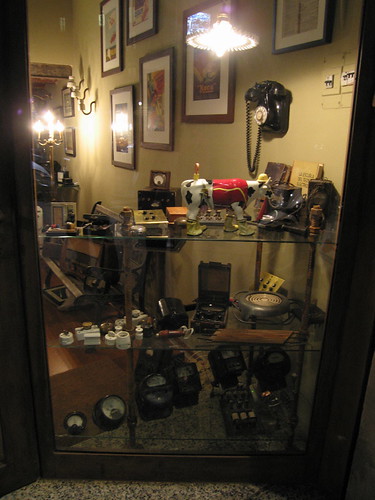
Lots of shops of wonderful had window displays - here's a few of my favourites.
A hardware shop:
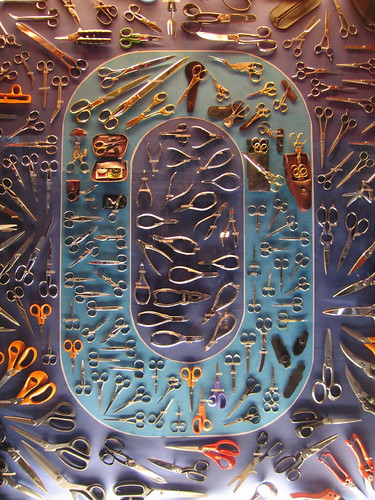
A plumber's / electrician's:
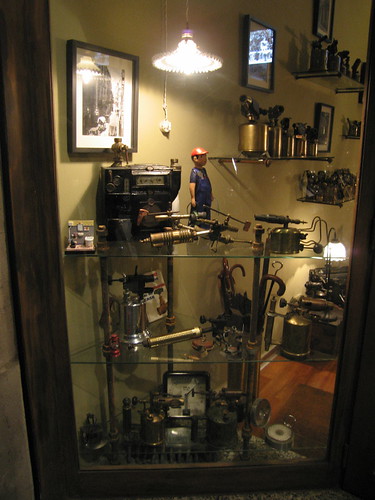
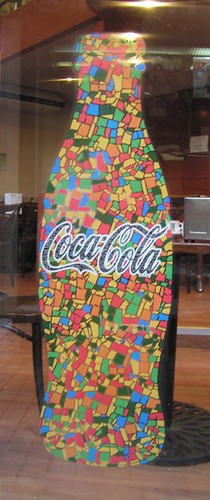
Gaudi-esque Coke in a cafe window:
Unfortunately I didn't get a photo of the shop window of a curtain shop which had made a large scale catenery model like Gaudi's and used it to showcase their tassels.
As a handmade souvenir, I bought MrMango an apron for his upcoming birthday upcycled from a vinyl banner from Vaho. They specialise in funky 'Trashion' bags.
Having had so much inspiration, I now need to get down to some making!

We visited several Gaudi sights and found that they've finished the interior of La Sagrada Familia since I last visited. I loved the stained glass.

My favourite part was wandering the streets of the Barri Gotic which are a pedestrianised labyrinth of lanes and squares . You can't go more than a few shops before coming across another colourful branch of Desigual or Custo Barcelona.
Lots of shops of wonderful had window displays - here's a few of my favourites.
A hardware shop:

A plumber's / electrician's:


Gaudi-esque Coke in a cafe window:

Unfortunately I didn't get a photo of the shop window of a curtain shop which had made a large scale catenery model like Gaudi's and used it to showcase their tassels.
As a handmade souvenir, I bought MrMango an apron for his upcoming birthday upcycled from a vinyl banner from Vaho. They specialise in funky 'Trashion' bags.
Having had so much inspiration, I now need to get down to some making!
18 Feb 2011
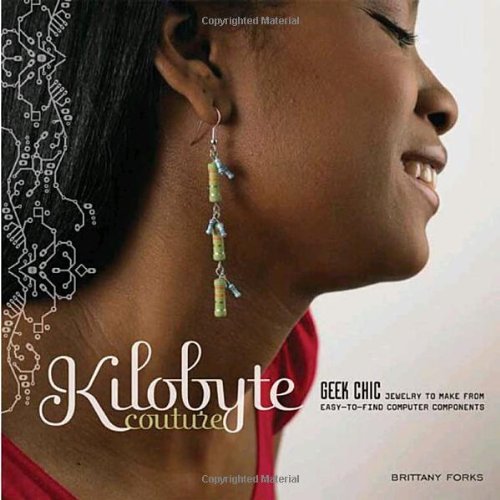
Book Review: Kilobyte Couture
Kilobyte Couture: Geek Chic Jewelry to Make from Easy-to-Find Computer Components by Brittany Forks; published by Watson-Guptill Publications
Although I’m not a geek (or at least I don't think so!), I am an electronic engineer who loves jewellery, so this book caught my eye in the library today.
The book shows you how to make jewellery from electronic components for some ‘geek chic’. Most of the projects are very wearable and not too out there. Having one or two pieces like this would certainly be a conversation piece amongst techie people although I think these designs would have limited appeal to non-techies.
The book provides a good introduction to the electronics components used: resistors, capacitors, thermal fuses, and LEDs and good clear basic instructions for how to make jewellery using these and standard jewellery findings. The photography is good and the diagrams are excellent.
The book mentions where the components are available in the US, and provides part numbers for them. The whole book is very US-centric, but all the materials mentioned are widely available outside the US so not a worry.
The main downside of this book is that is has a very narrow focus and the projects lack variety. Essentially, the book shows you how to use electronic components instead of beads again and again. I would have liked more variety in the materials used e.g. circuit boards, cables, floppy disks, computer keyboards , CDs etc. all offer interesting possibilities for jewellery making.
My other gripe is that though the cataloguing details in the front include ‘recycling (waste)’, the book clearly says to use new components due to the potential risk from lead solder in used components.
Finally, being a pedantic engineer, I found some of the project names annoying - LAN Party Dangles, Byte Bouquets, Bitmap Bookmark etc. as the relationship between the basic components used and technology referenced is pretty removed, and makes me questions the author’s geek credentials.
Ultimately, I would recommend this book to beginner jewellery makers, who are interested in the ‘geek chic’ look featured. For more experienced jewellery makers, I suggest getting hold of some electronic components and just having a play.
12 Feb 2011
Bottle caps galore
As shown in my last post, I sent a couple of bee bottlecaps to sonjaboo.
Mr Mango is a big real ale fan and I've been hoarding collecting all the bottle caps, thinking I could use them for something. The bees ones are my favourite so I was excited to be able to share them.
However, this made me realise how many I'd collected and with little inspiration as to what to do with them and a very long list of projects already, I've concluded that I should get rid of them as part of my decluttering. The trouble is that I'm loathe to bin them while other people are buying new ones to craft with.
So I'd like to give them away / swap them / sell them but haven't worked out how or where. Any thoughts, anyone?
11 Feb 2011
Matchbox Swap part 2
Now that Sonjaboo has received her matchbox, I can show you what I sent her. Amongst her interests, she mentioned that she liked bumblebees and writing themes. She was also keen to receive something British ( as she's in the US).
I not sure what sort of writing themes she had in mind, but I do enjoy some wordplay so I decorated the outside of the matchbox with phrases associated with bees:
I was surprised at how many bee related phrases there are. Some of the ones I didn't include were:
Inside I included a couple of crafted items - an embroidery of a black cat, inspired by Sonjaboo's stained glass piece
and continuing with the bee / wordplay theme, a magnetic bookmark featuring Bee Quiet and Bee Have, the bees from an old British cartoon called Stoppit and Tidyup.
For the crafts supplies, I included a couple of bottle caps featuring bees, some British stamps and a few yellow beads.

I not sure what sort of writing themes she had in mind, but I do enjoy some wordplay so I decorated the outside of the matchbox with phrases associated with bees:
 |
| The birds and the bees |
I was surprised at how many bee related phrases there are. Some of the ones I didn't include were:
- Mind you own Beeswax ( I thought that might be a little rude)
- Queen Bee
- A bee in your bonnet
- Make a beeline for...
I decorated the tray outer in a yellow and black stripy pattern from a magazine page - finally found a use for all the Engineer and Technology magazines I never get round to reading.
Inside I included a couple of crafted items - an embroidery of a black cat, inspired by Sonjaboo's stained glass piece
and continuing with the bee / wordplay theme, a magnetic bookmark featuring Bee Quiet and Bee Have, the bees from an old British cartoon called Stoppit and Tidyup.
For the crafts supplies, I included a couple of bottle caps featuring bees, some British stamps and a few yellow beads.

I had hoped to squeeze a few more things in but in the end it was a rather tight fit just getting these items in. If I did it again, I might make my own matchbox that I could tweak slightly to let the bottle caps fit in side by side, so there would be a bit more space.
All told, I had a lot of fun making the matchbox.
All told, I had a lot of fun making the matchbox.
Subscribe to:
Posts (Atom)


